
Root Android Device with SuperOneClick
There are different ways to root an Android device and there are also numerous tutorials available on to root an Android device on the internet. But all the tutorials to root android device are not easy. So, in this post, I’m going to share an easy tutorial to root your Android device with SuperOneClick.
How to Root an Android Device with SuperOneClick
- At first, download the SuperOneClick app for your computer [ Download ] [Don’t launch the app after downloading]
- Now connect your Android device using a Data Cable/USB Cable to your computer [ Make sure that the SD card has not been mounted ]
- In this step, you need to enable USB debugging on your Android Device. To enable USB debugging, simply go to Settings->Applications->Development and mark the “USB Debugging“ option
- Now, double-click on the SuperOneClick.exe, which you have downloaded before from the above link, to launch it.
- When you launch the SuperOneClick.exe, the app lets you root your Android device, showing to options to root. Simply click on Root
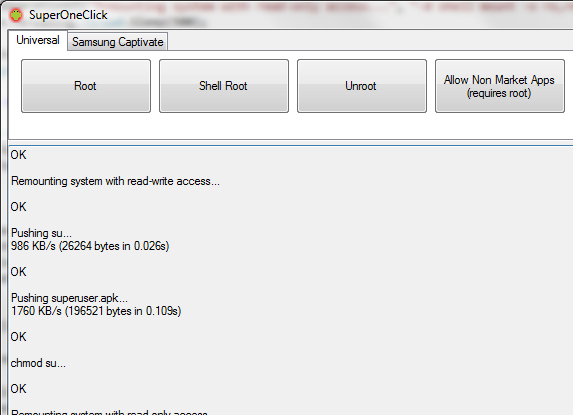
- Now you should wait until it completes the root process.
- Once it completes the root process, reboot the phone and check if the device has rooted successfully, looking for the new SuperUser Icon in the apps of your device.
So, you should now root your Android device to earn a better user experience.